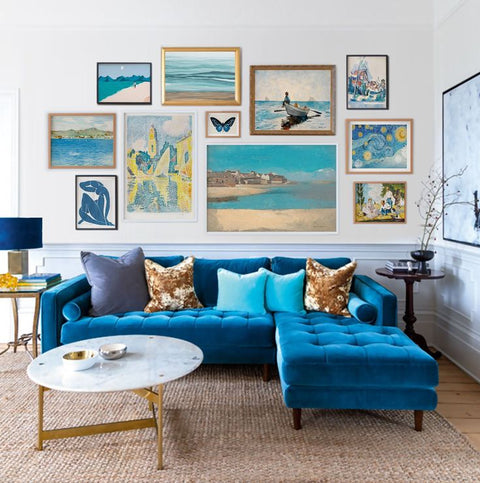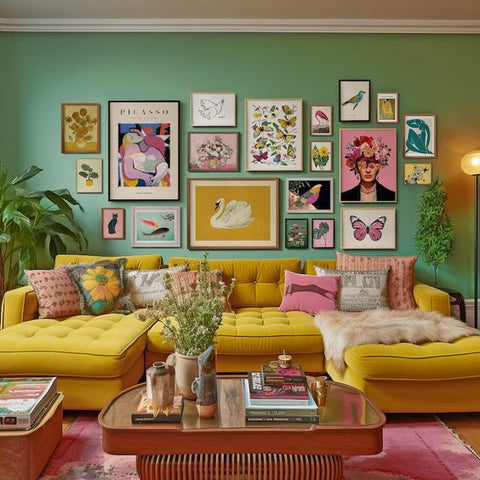
Creating a cohesive gallery wall is an exciting way to personalize your space, showcasing a mix of art, photos, and mementos that reflect your style and story. However, achieving balance and harmony while mixing and matching different pieces can be tricky. In this post, we’ll guide you through the process, offering tips and tricks to help you create a beautiful, cohesive gallery wall that enhances your home.
Why Create a Gallery Wall?
Gallery walls are popular for several reasons:
- Personal Expression: Showcase your taste, memories, and creativity.
- Versatility: Adaptable to any room and style.
- Visual Impact: Acts as a focal point, adding character to your space.
- Creativity: Mix colors, textures, and patterns for a unique look.
Step 1: Choose a Theme or Concept
Start by selecting a theme or concept that will tie your collection together. This could be:
- Color Palette: Stick to a specific color scheme, like monochrome or shades of a particular hue.
- Subject Matter: Focus on a theme, such as nature, abstracts, or portraits.
- Style: Keep your pieces within the same artistic style, like modern or vintage.
- Frame Style: Use matching or complementary frames to unify different pieces.
Step 2: Curate Your Collection
Select art that fits your theme, balancing sizes, mediums, and colors. Choose pieces that resonate personally with you, and ensure there’s a harmony in the colors and tones.
Step 3: Plan Your Layout
Carefully plan your layout before hanging anything:
- Symmetrical Grid: For a formal, balanced look.
- Asymmetrical Cluster: Ideal for a casual, eclectic vibe.
- Linear Layout: Perfect for narrow spaces.
- Central Anchor: Start with a large central piece and arrange smaller ones around it.
Use paper templates or digital tools to visualize your layout before committing.
Step 4: Mix and Match Frames
Mixing frames can add interest, but keep it cohesive by:
- Limiting the Color Palette: Stick to two or three frame colors.
- Consistent Materials: Choose frames of similar materials.
- Uniform Matting: Use consistent matting to tie varied frames together.
- Varying Sizes: Combine different frame sizes to add depth.
Step 5: Create a Focal Point
Anchor your gallery wall with a focal point—a larger, vibrant, or uniquely framed piece that draws the eye. This helps balance the overall look and gives the wall a sense of purpose.
Step 6: Hang Your Art
Now it's time to hang your art. Keep these tips in mind:
- Use a Level: Ensure your pieces are straight.
- Measure Carefully: Plan spacing meticulously.
- Command Strips: Consider using these for easy adjustments.
- Start from the Center: Build outwards from your focal point.
Step 7: Consider the Surroundings
Ensure your gallery wall complements the room’s decor, lighting, and furniture alignment. The art should feel like an integrated part of the space.
Step 8: Add Personal Touches
Make your gallery wall unique by adding personal touches:
- Family Photos: Incorporate meaningful images.
- DIY Art: Include your own creations.
- Mementos: Frame sentimental items like letters or tickets.
- Sculptural Elements: Add depth with small sculptures or layered frames.
Step 9: Let It Evolve
Your gallery wall can evolve over time:
- Seasonal Updates: Swap pieces to reflect seasons or holidays.
- Rotate Art: Change out art regularly for a fresh look.
- Add New Pieces: Integrate new art as your collection grows.
Conclusion: Crafting Your Perfect Gallery Wall
A well-curated gallery wall is more than just decor—it’s a reflection of your personality and style. By following these steps, you can create a cohesive and visually stunning display that enhances your home. Remember, your gallery wall is an ongoing project, so don’t be afraid to make changes and let it grow with you.
Enjoy the process, and happy decorating!


